Take The Challenge Out of Tack Strips |
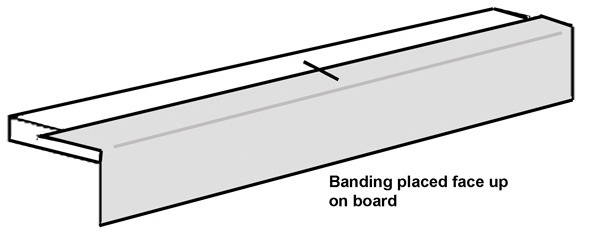
What is a tack strip? It is the band you attach to the top of a window treatment to cover the raw edges. The band is then stapled or velcroed to a mount board or hardware. I have always called these waistbands because they resemble the waistband of a skirt. However, the Window Coverings & Home Furnishings Standards, published by WCAA, defines a tack strip as:
“For window treatments. A piece of fabric attached to a valance [treatment] at the top to finish the raw edges and to allow for it to be mounted on the board.”
Early in my career, I was asked to replace an existing valance with a new one exactly like it. The original valance was finished with a tack strip (aka waistband) with shade rings sewn to the back of the tack strip. The shade rings were hooked to tacks on the top of the board. Hence the name ‘tack strip.’
Applying a tack strip is an optional step to finishing a treatment. I finish all of my treatments with a tack strip. I developed this habit when I first started sewing and installed all of my own work. It was easier for me to install hardware and boards without the treatment attached. I could then Velcro the treatment components to the hardware. |
When do you apply a tack strip?
Shipping treatments. If the treatment can be removed from the board or pole, it can be packed neatly and compactly for shipping. To save on shipping charges, decorative hardware can be shipped directly to the client or boards can be cut and covered on site.
Transporting treatments. If the treatment is too large and/or heavy to transport and install as a single unit, tack strips allow you to remove the treatment pieces from the hardware and transport and install in stages.
Metal decorative poles. Treatments mounted on metal poles are usually attached with Velcro. Hard (hook) sticky Velcro is candy-cane wrapped around the pole and soft (loop) Velcro is stitched to the tack strip.
Flexibility at install. Removable components allow the installer a little bit of flexibility at the install. The individual components can be shifted to compensate for minor inconsistencies in measures.
Client selling point. Clients absolutely love the fact that they can remove their treatment from the board/pole and have it cleaned.
Add on treatments. When the client adds pieces to a finished treatment, it is easy sew a tack strip to the piece and staple or Velcro it on top of the existing treatment.
|
When to avoid tack strips:
The tack strip shows on the slope of arched and slanted treatments. If it is necessary to attach a treatment to an arched frame with a tack strip, make the strip the same depth of the projection.
A perfect fit every time.
The secret to a perfect fit every time is to pin the tack strip on the board first, then pleat or gather your treatment to its finished face width on top of the tack strip. Putting the tack strip on the board as a first step solves three major challenges:
The strip is fitted flat to the board first. Therefore, it will always be a perfect fit.
It eliminates the extra step at the end of the process of fitting and pinning the tack strip to the treatment. The tack strip is already in place and is automatically caught in the pins when prepping the treatment for the sewing machine.
The tack strip pinned to the back of the treatment stabilizes it as it is detached from the board and carried to the machine for sewing. If properly pinned, pleats and gathers will not shift.
Tack strips are simple to apply. I recommend that you practice fabricating treatments with tack strips until you are comfortable and proficient with the process.
|
Step by Step Instructions:
The following instructions refer to board mount treatments. If you are assembling your treatment on a pinnable wall or flat on your table, follow the same steps, pinning the tack strip taut and flat and assembling the treatment on top of it. |
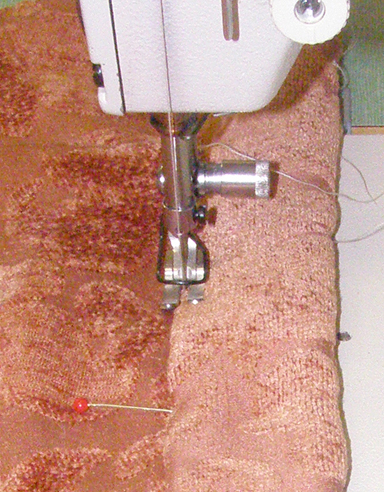
- Cut the fabric for the tack strip at the same time you cut the rest of the treatment. You can piece strips of scraps to get the desired cut width.
The finished tack strip is the full face width and returns of the treatment. The finished length is usually 1-2”. Though it can the same as the board projection. Decide what your finished size of the tack strip will be. Then calculate the cut dimensions.
|
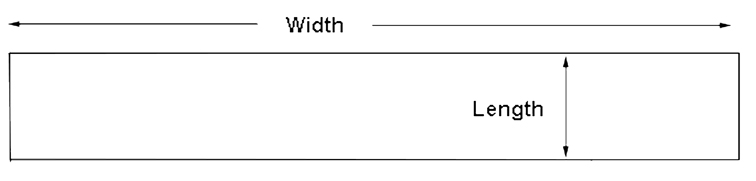 |
Cut width: Face width of treatment
+ Double the returns
+ 2” (minimum for 1” side hems on both sides)
= Cut width
Cut Length: Top seam allowance. **
+ Double the finished length of the tack strip
+ 3/4”____(seam allowance)
= Cut length
** Top seam allowance is the amount of fabric at the top of the treatment that is affixed to the top of the board. It is usually 3/4” – 1.5”, depending on your pattern and/or fabricating standards.
|
2. Sew the treatment and prep it to the point where it is attached to the board or pole. Mark the center top of the treatment.
|
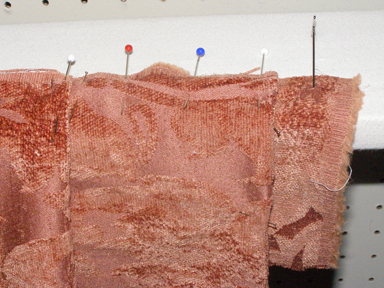
3. Attach the tack strip to the board.
Mark the center of the tack strip.
Pin the tack strip to the board, right side up, leaving enough at both sides for the returns and hems (If working on a flat surface, pin the tack strip out flat at the returns). The top of the strip is level with the top seam allowance. The rest of the strip hangs off the front of the board. Pin taut, but do not stretch.
With this step, you ensure that your final tack strip is the exact finished width.
|
 |
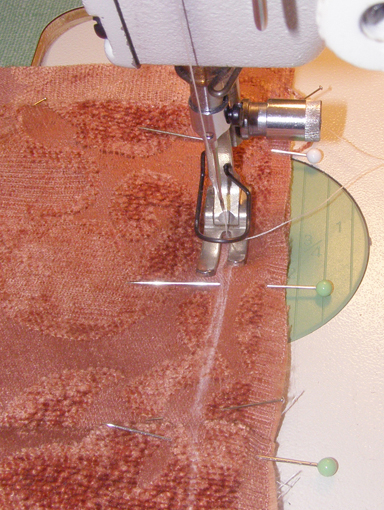
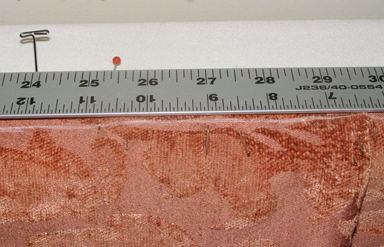
4. Pin your treatment to the board.
Align the center point on the treatment to the center point on the tack strip. The top of the treatment is level with the top of the strip. Shape and fit the treatment to finished width. Ignore the strip while you pin and shape the treatment.
|
5. Secure the layers.
Once the treatment is dressed and pinned to finished width and ready to be sewn, pin all the layers together, catching the tack strip. Use as many pins as necessary to keep the treatment stable when you detach it from the board and carry it to the machine.
With this step, you are assured that your finished treatment will be the correct face width because it is pinned securely to the tack strip. Also, the tack strip keeps all the layers, gathers and pleats stable as you remove it from the board and carry it to the machine.
|
 |
6. Optional: Draw a straight line on the treatment.
This is the sewing line. It is usually set back from the front of the board at least 1/4”, but can be as much as an inch.I like to draw a straight seam line that is perfectly parallel to the front of the board.
Often,the treatment has ragged edges and it is difficult at the machine to know exactly where the seam line should be.
|
 |
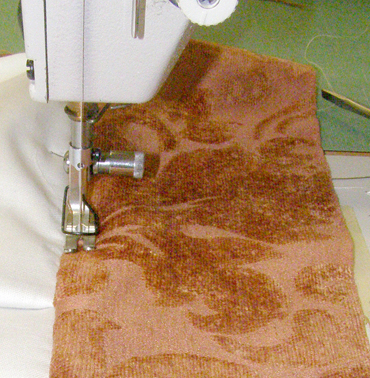
7. Stitch the layers together.
Sew the treatment through all layers. Keep everything taut and smooth as you sew. If the top layers start to push forward, stop sewing and set pins closer together.
With this step, you are securing the top of your treatment (the gathers/pleats, etc) and you are attaching the tack strip in one step.
|
|
8. Optional step. Understitch.
Turn the treatment right side down with the tack strip pushed up away from the seam. Stitch near the first seam, catching the seam allowance underneath. This will allow you to turn and stitch the strip down neatly.
This is an understitching technique that will ensure the tack strip is not rolling back on the first seam. I found it especially helpful with this particular valance because the fabric was a soft chenille. The understitching ‘pressed’ the first seam for me.
|
|
9. Turn the side hems.
Lay the treatment right side up on the table. Smooth the tack strip up from the back. Turn the side hems in and pin to secure.
|
|
10. Pin the strip for sewing.
Turn the long raw edge under and pin down along the first stitch line.
You want to just cover the first stitch line.
|
|
11. Topstitch closed.
Use thread that blends with the fabric or invisible nylon thread. Stitch right on the edge of the fold. If your stitches are inset, the fold will stand up and be seen on the board.
Keep all the layers taut and aligned. If the top layer begins to push forward, stop and add more pins to keep it in place.
|
|
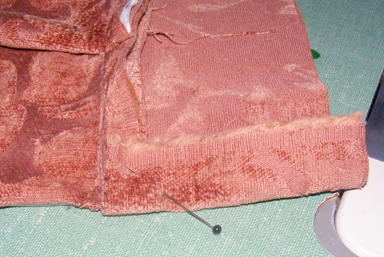
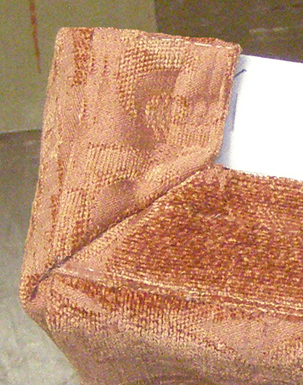
Mitred corners
This technique is used on board mounted treatments with returns. The mitred corner ensures a polished finish, and helps to control the bulk of fabric at the corner when the treatment is wrapped around the side.
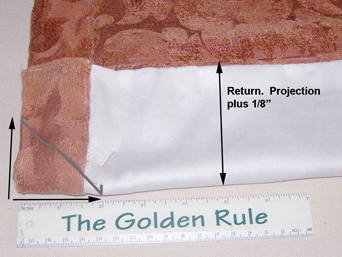
The board allowance is the length of the tack strip plus a bit of the treatment. You do not want your tack strip to be right at the front edge of the board. It needs to set back 1/4-1/2” minimum. It can set back farther if you wish (the beauty of a tack strip is that you can shorten a valance or panel on site if it is too long by simply moving the it back farther on the board). However, you must calculate a board allowance before mitering the tack strip. Example. If your tack strip is 1.5” and you wish to set it back 1/2”, your board allowance is 2”.
The steps are simple:
- Fold back the return to the projection of the board plus 1/8”. Align the top edges and smooth flat. It is important to fold the return back evenly and straight.
|
2. Draw the stitching line.
From the top corner of the fold, measure in across the top the measure of the board allowance. Measure down the fold the same measure. Mark both points. In this illustration, we have marked 2” across the top and down the fold.
3. Draw a straight line between the two measures. Stitch on this line.
|
|
4. Turn the fold right side out. Do not trim away the corner triangle.
When laid on the board, the finished corner is flat and neat. The bulk of the corner triangle is folded towards the back/side, not towards the front of the board.
|
|
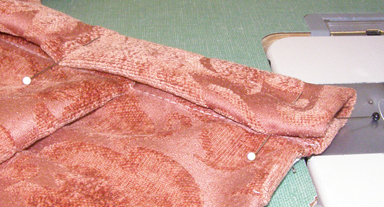
A side note here.
The mitred corner neatly controls and minimizes the bulk at the top corners of a valance. Yet, there are times when the fabric and/or layers you are working with are very thick and the triangular seam in the mitred corner is too bulky to lay down flat out of sight. This happened to me with the sample valance featured in this article. I chose a scrap of soft chenille. The thick chenille fabric I chose resulted in very bulky mitred seams.
I placed the valance on the concrete floor of my workroom and pounded the mitred seams with a hammer. The result was immediate and effective. The seam flattened out nicely, allowing the corner returns to hang properly on the board.
Hammering bulky seams is a very old method of taming the bulky beast. Try it sometime when you are struggling with a bulky seam or a corner on the board that you need to flatten. |
Velcro
The tack strip can be stapled to the board or pole. Or, soft (lloop) Velcro is sewn to the strip and hard (hook) Velcro is stapled to the board or pole. The following are tips for sewing soft Velcro to tack strips and for applying hard Velcro to the board or pole.
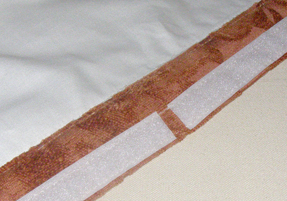
Sewing soft (loop) Velcro to the tack strip:
1. Place the Velcro as close to the top back of the tack strip as possible.
2. Sew both long sides of the Velcro, as close to the edge as possible.
This looks neat and controls the edges. Use taut sewing techniques (stretching the strip out flat under the Velcro) to avoid shrinking the strip with the stitch tension.
If you do not have coordinating thread, you can simply put nylon thread in the bobbin. You can use white or ivory thread on the top with the Velcro, but the nylon thread will be invisible on the right side of the tack strip.
|
3. Break up the Velcro on long straight segments.
Sew 8-10” long strips with a 1/4-1/2” space between them. Breaking up the velcro offsets any shrinkage or stretching due to sewing it on. It is key in giving the tack strip a little flexibility to adjust to the finished width of the board.
|
 |
4. Sew a tab of Velcro on both returns
|
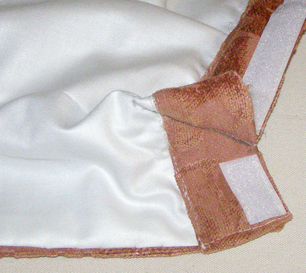 |
Apply hook (hard) Velcro to the hardware:
If stapling to a board or wood pole:
Staple towards the top back of the Velcro strip. Otherwise, the weight of the treatment may pull it forward.
Stretch the Velcro strip very tight. They do tend to stretch over time. Take as much of the stretch out of it as possible.
When covering the board, plan ahead when stapling on the cover. The board will look neater if the staples are covered by the Velcro strip.
For metal poles:
Either screw a flat board to the back of the pole on which to attach the Velcro strip,
Or candy cane wrap sticky Velcro to the pole. Never stick a straight line of Velcro to a metal pole. The weight of the treatment will pull it off over time.
|